Create Stunning Fused Glass Christmas Projects in Under 15 Minutes
Learn how to use the Glass Tattoo Stencil System to make Christmas themed side dishes, oval trays, or any fused glass item that you can think of.
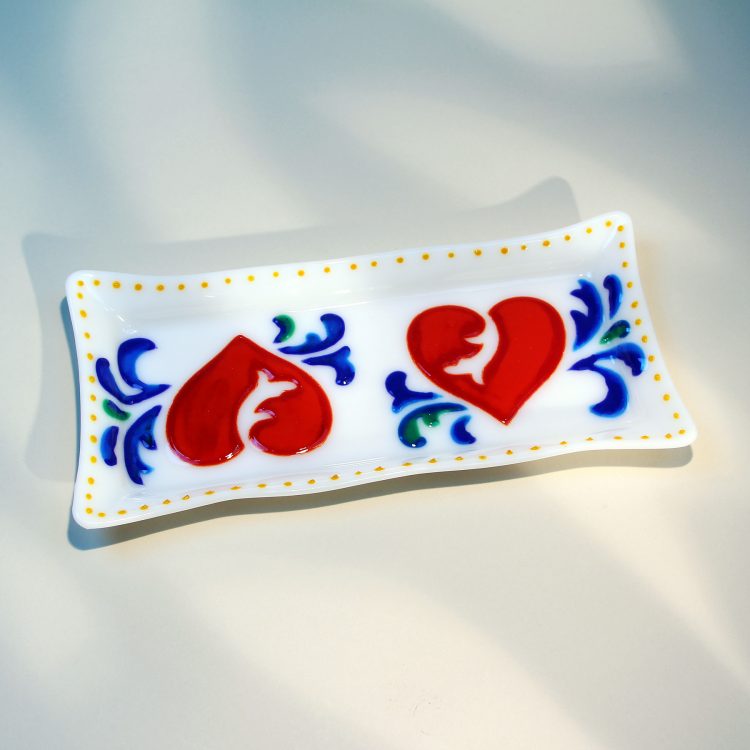
We get a huge response every time we demonstrate our Glass Tattoo Stencil system and show fusers how easy and fast they can create intricate and multicolored fused glass project designs.
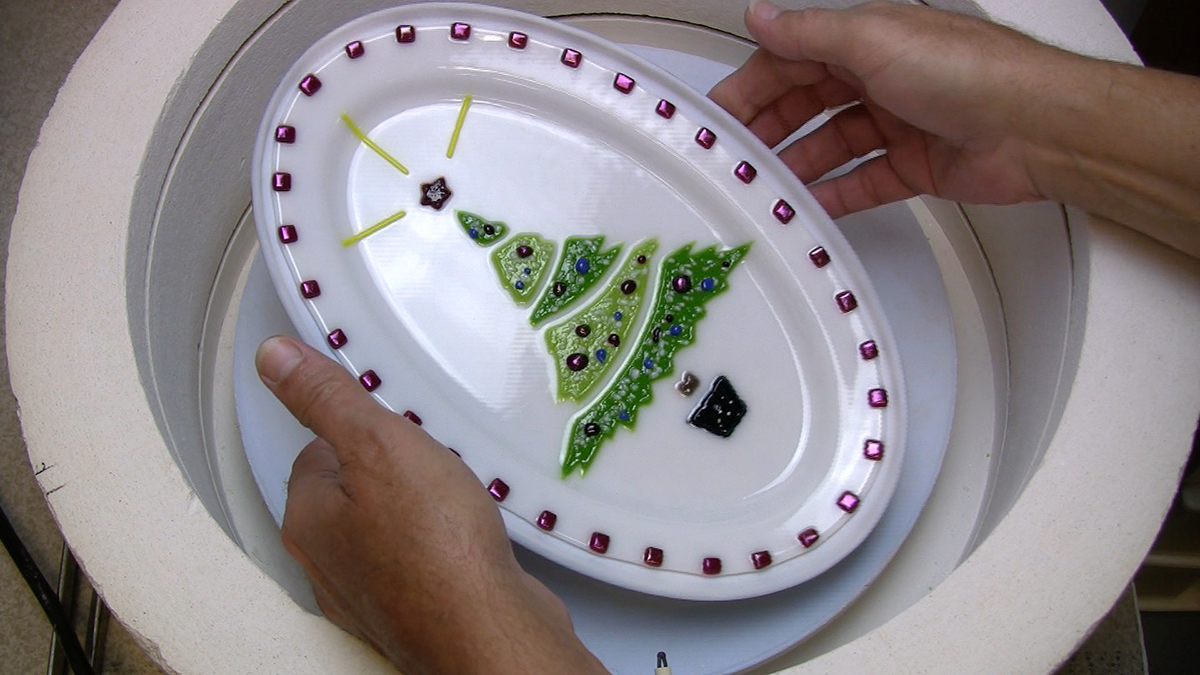
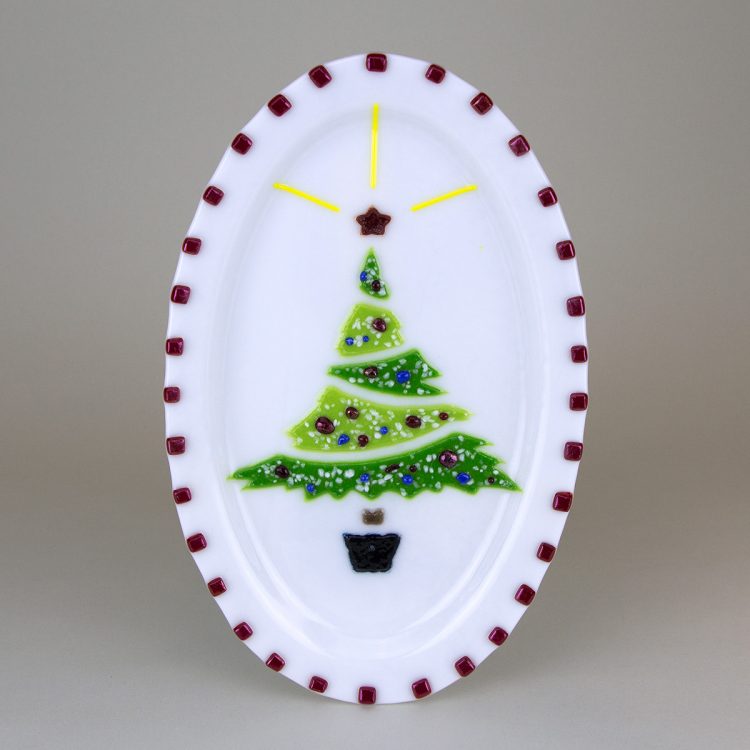
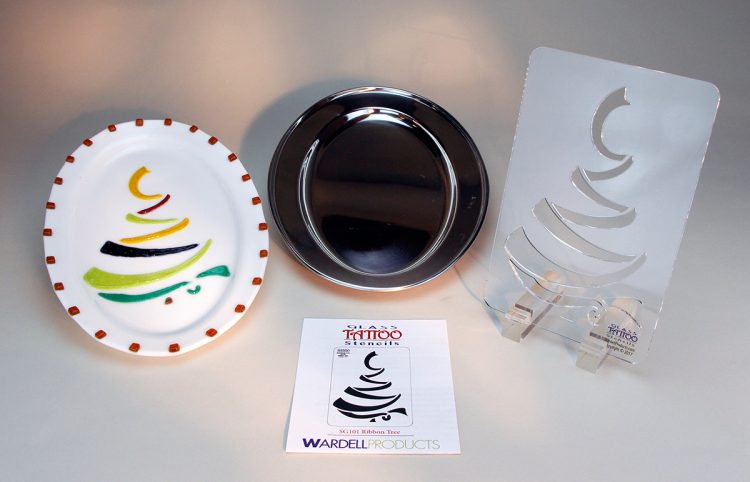
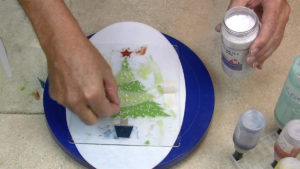
I made a couple of Christmas tree oval trays using two of our Christmas stencils. The first one I made using the Parlor Perfect Tree stencil (RW201). It really turned out fantastic.
I used the Ribbon Tree stencil (SG101) to make an oval tray using the same stainless steel slumping mold that I used to make the Parlor Perfect Tree tray. I am not exaggerating when I tell you that it took me less than 10 minutes to add this ribbon tree design to my oval base glass.
BTW: All of our Christmas themed stencils are on sale now until December 18, 2017. Visit the Glass Tattoo products page subcategory Holiday Stencils.
I will take a little time to organize and mix your Tattoo Goo colors and load them into the squeeze bottle applicators, but once you have a good variety colors, it only takes a few minutes to actually create the stencil design on your glass base.
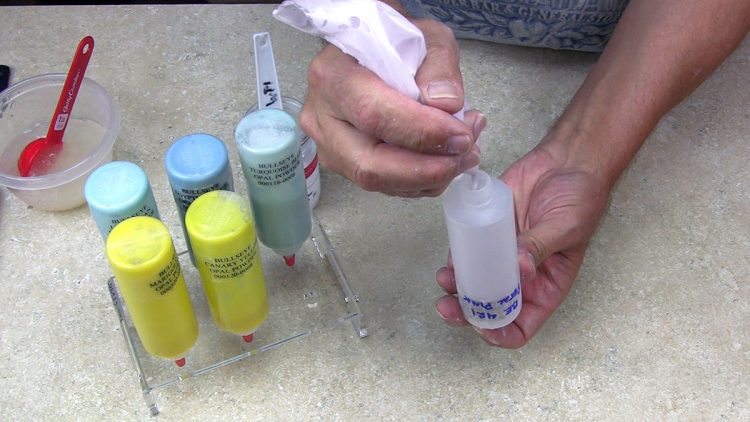
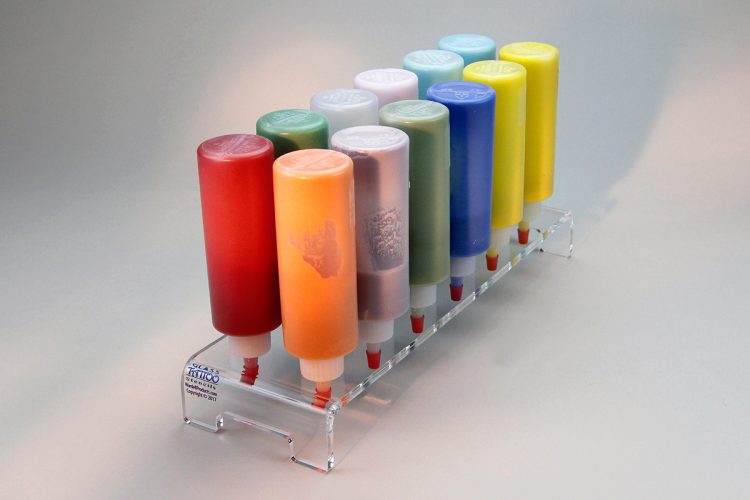
The good news is you can store the mixed Tattoo Goo colors for up to three months and they will remain good to use again. You must remember to securely snap the red tip closer cap on the applicator bottle after every use and keep the applicator bottle tip-side down in a bottle caddy. This is a photo of our GTBC12 Bottle Caddy
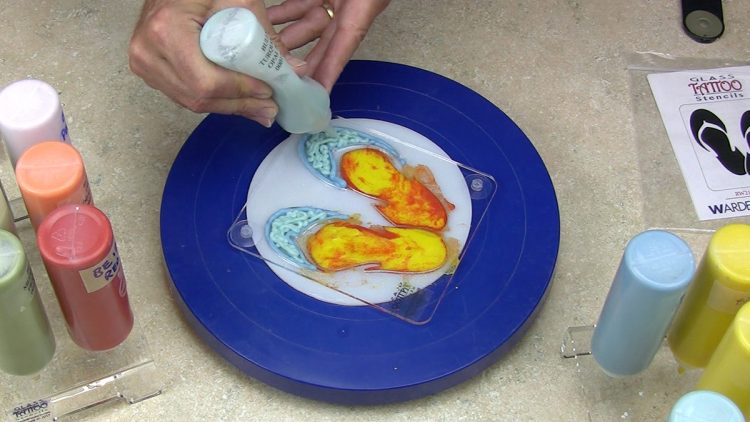
So let me walk you through the Glass Tattoo Stencil process:
-
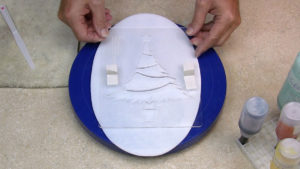
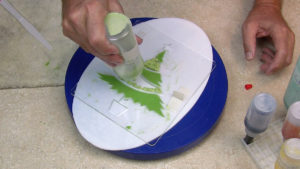
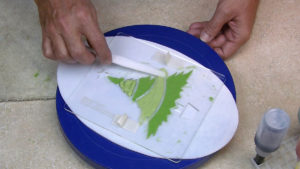
Place the 1/8” thick Glass Tattoo Stencil on a fusing glass base
-
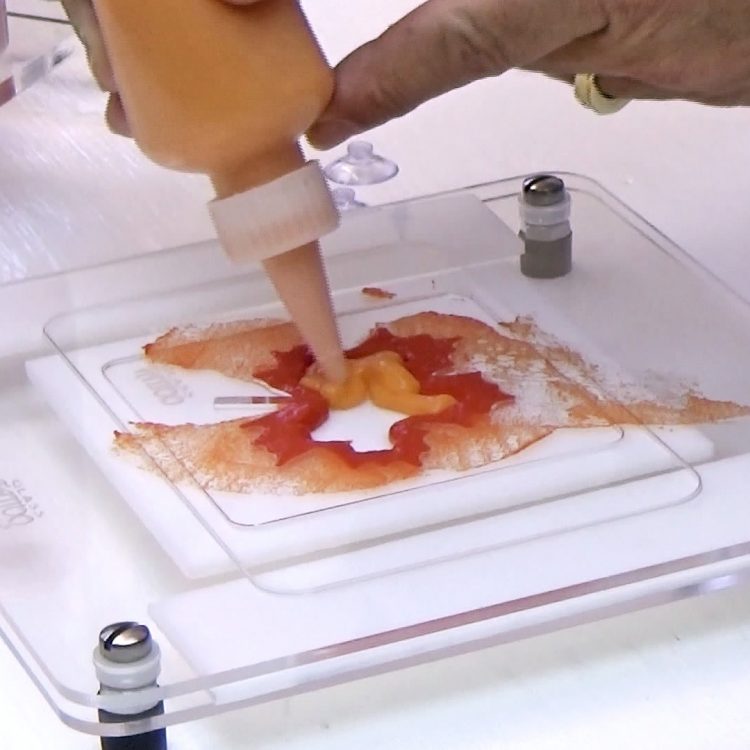
Fill the stencil cavities with a 50/50 mixture of Glass Tattoo Goo and powdered glass frit using a squeeze bottle applicator.
-
Level and smooth the Tattoo Goo color with an artist’s palette knife
-
Add any additional decorative components that your designer heart desires, such as stringers, coarse frit, etc.
-
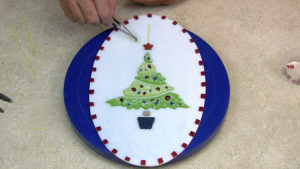
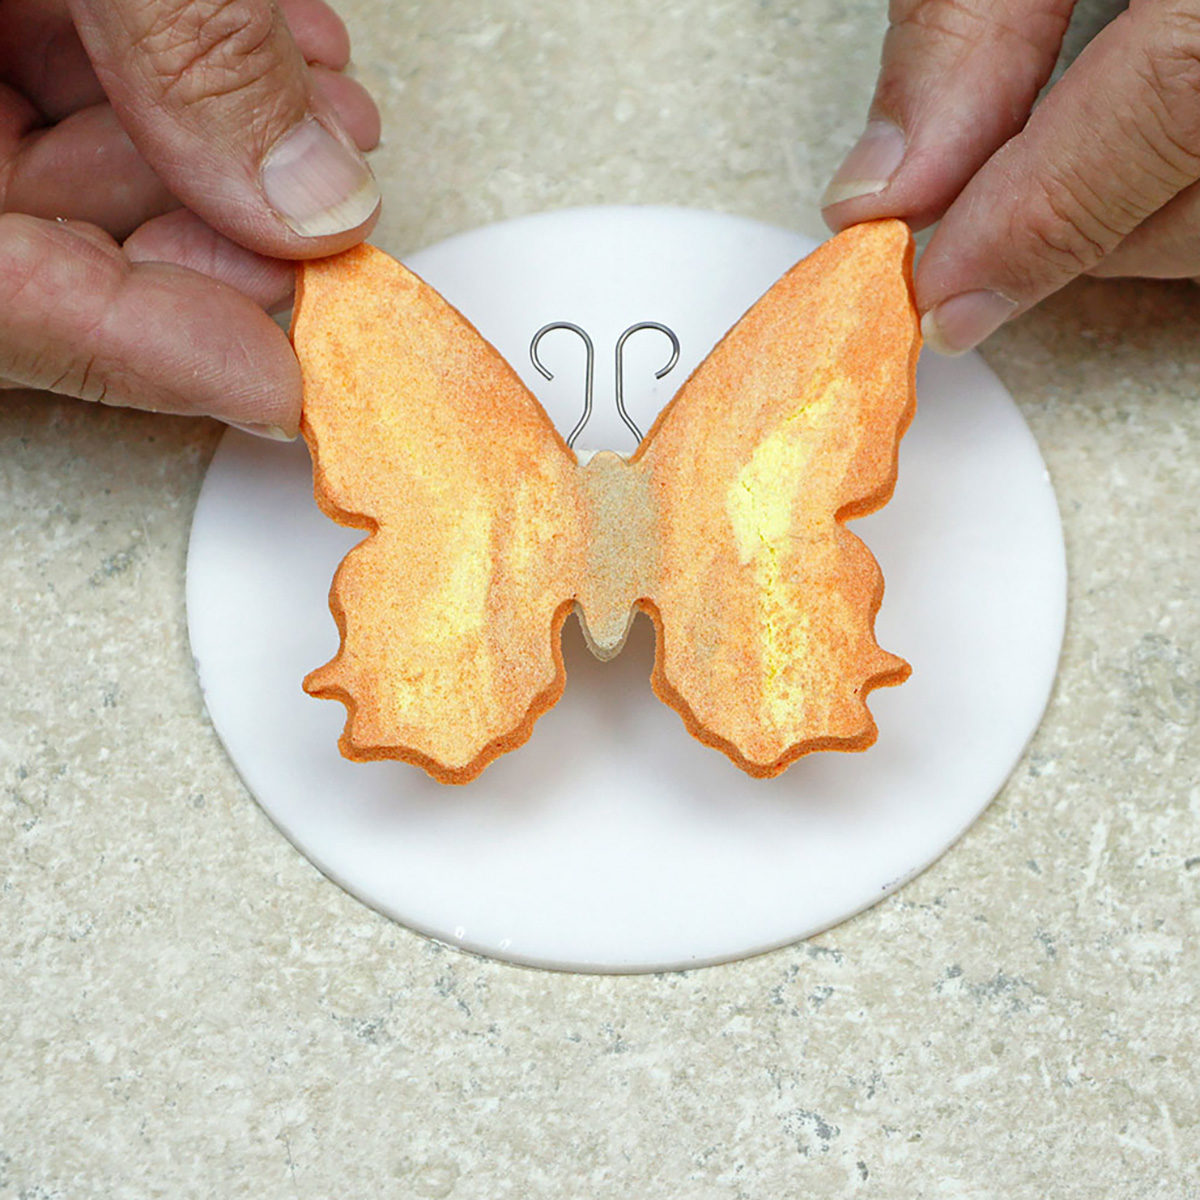
Lift the stencil straight up to reveal your masterful creation.

-
Finish your design with any other decorative touches, such as the squares I placed around the border of the oval.
-
Your design piece is now ready to be fired in the kiln. I fired mine to a contour fuse level but these Glass Tattoo designs can be fired to whatever fusing level you choose, from Elevated Tack all the way up to Full Flat Fused.
-
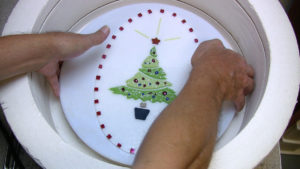
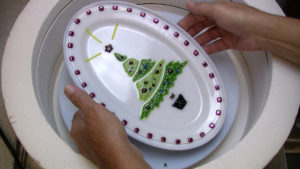
The final step is to place the fuse fired design oval onto the prepared stainless steel oval tray mold then put it into the kiln for a slump firing.
One of the best features of the Glass Tattoo Stencil process is the ability to add multiple colors to your design all in one session. You don’t have to wait for the first color to dry before applying the second or third or as many colors as you like. In fact blending colors together to create streaks and swirls offers an amazing creative advantage.
I made a video showing the entire process from mixing the Tattoo Goo colors to slumping the design blank in the stainless steel mold. Click on the image below to watch that video.
[su_vimeo url=”https://vimeo.com/185034612″ width=”750″ height=”422″ responsive=”no”]
10 Responses
how can I get a copy of this tree thanks barbara
Hi Barbara: The Parlor Perfect Tree is still available, however we took it off the website since Christmas Season has passed. The price on that stencil is $24.95. I can put it back up on the site temporarily if you want to place an order just let me know. BTW, the order you placed yesterday will ship today.
Hi again, I teach Fused Glass at a local college here and have been since about 06 or 07 I teach senior citizens. I would like to get your permission to teach them how to do the stenicl project using the ones I just bought. I forgot to ask you for permission when I ordered them. I have given away many of your JOY OF FUSING books and regulary promote it. It’s the best book for my students when they get a new kiln. The explanations are wonderful. I teach beginning and advanced and have 15 in adv. this semesterd as school just started the 22nd. and I know I am behind and want to teach this the first Monday in Feb. I am also looking for a PDF on this if you have onethat I can download. Hopine you get this before you close today. Thanks again for you help .
Oh I have 21 in my beginning class but they won’t be doing this. Barbara
Hi Barbara,
Did Randy answer your questions? It is wonderful you are teaching at your local college and have a nice size class, 21 in your beginner class, excellent!
We appreciate your support of our products.
Carole Wardell
I was wondering if you would be making some smaller stencils for night lights? I live in a coastal area and would be interested in a smaller sea turtle, shells, etc
Hi Karen:
Thanks for the great suggestion. We have had some requests for smaller designs that could be used for pendant jewelry and I’m thinking those could be used for nightlights as well.I have a couple of other projects that I’m working on but I’ll turn my attention to this idea by early May. So you interested mainly in sea life designs? What would you say is the typical size of the glass that you would use to make a nightlight? That will help me to design something that stays within the outside perimeter.
I purchased the Palm tree and chair stencil and have some questions. I followed the directions and added the colored goo to the stencil then used the tabs to lift off the stencil. I had little points at the end of all the palm leave edges (all the pointie spots). I tried to use the spatula to make them lay flat but the goo stuck to the spatula and in some cases made them worse. Is there a trick to this? What is the best way to smooth out any points you may get when you remove the stencil? Also on the chair the arms of the chair are very thin. When I lifted off the stencil the goo came away with it. I had to try and draw on arms after I lifted the stencil. Any suggestions for this? I really like the product and want to try again but I hope you can give me some pointers.
Thanks,
Edie
Thanks for the comment Edie. Those little points at the end of all the palm leaves should not pose a problem, as they will mostly flatten out during the fusing process. If you take your project to full-fuse they will disappear completely, if you take it up to texture fuse level or contour fuse level the points will remain slightly but they will not hurt your project visually (in my opinion I think it makes the leaves look more like nature). As you discovered, trying to flatten them out with your spatula knife can cause more damage than it fixes. I recommend try fusing this piece with those little points as they are to see for yourself how they look. As for the chair arms, you are correct some of the Gue color will stay on the glass and some of it will lift off with the stencil. The thin amount that is left on the glass is usually quite enough to give the visual effect that the design needs. However, you could choose to add some additional Gue color freehand (as you mentioned) but that is not usually necessary. I would suggest to go ahead and create your palm tree and Adirondack chair design, lift off the stencil then fire exactly the way it is. I think you’ll be surprised at the results.
Hope this helps,
Randy the Fuse Whisperer
I want to make the Festive Lights Bowl. I have the instructions from the Fall 2016 Glass Patterns Quarterly using fiber paper stencils making individual light bulbs to place on the glass circles. I’m wondering how you would use the glass tattoo system for this project. Would you have to cut the stencil up into pieces to apply the Goo colors directly on the glass circle? Or would you be using the glass tattoo stencils using the Goo directly onto shelf paper and firing. Then place on the glass circle. I need some direction on how to proceed. Thank you, Janice
Thanks for the question. Wafers are created in almost the same way as standard stencils designs except they are made on a plastic sheet and left to dry rather than make them directly on the glass. Here is an excerpt from the How-To information sheet that comes with our wafer stencils.
Creating the Component Wafers
• You are going to create the wafers and let them air dry, then you will place the dried wafers on your base glass in any pattern design that you choose. To create the wafers place the Tattoo Stencil (with the Lift-Tabs in place) on a sheet of smooth clear acetate (overhead transparency plastic) or similar type of plastic sheeting, even the plastic bag that the stencil came in will work (but that is not ideal).
• Choose one of your colors and squeeze some of the Gue color into a stencil space. You’re trying to fill the space with just enough Gue color to come to the top of the stencil. Use a Glass Tattoo® Spreader Knife to smooth the surface of the Gue color to make it level with the top of the stencil. If you have too much, scrape it off using the knife and put it back into your squeeze bottle.
• Continue to fill each space in the stencil with the color of your choice. Don’t be afraid to mix colors within a space to create a multi-tone design. It’s your time to be creative.
• When all stencil spaces are filled with Gue color, grasp each pull-tab between your thumb and index fingers and SLOWLY pick the stencil straight up. This is why a more ridged plastic sheet is better than a plastic bag, when you’re lifting the stencil, a flimsy plastic will tend to lift with the stencil, however it can work if you lift very slowly, the Gue color design will eventually slide out of the stencil and remain on the plastic sheet.
Now you must wait until the wafer is completely dry. That will take 8 to 12 hours depending on the humidity level in your area. Once the wafers are dry they will lift very easily from the plastic and be remarkably strong, but they will break of course, so be gentle.
• Now you can arrange the wafers on your base glass in any pattern you wish. Paste the wafers down using a small dab of Gue then add any other adornment components you choose to finish your masterpiece.
Hope this helps…
Randy (The Fuse Whisperer)